
A broken paver can make an entire driveway look neglected, but tearing out the whole surface is rarely necessary. In my work, replacing a damaged paver starts by distinguishing a stable surface defect from a structural failure. Minor chips in concrete pavers may allow paver repair or concrete repair, but cracked units usually need replacement.
On a paver patio, color matters as much as fit. A new paver can look too bright beside weathered brick pavers, even with the right size and pattern. I compare surrounding brick pavers, check damage, foundation, and joints, then begin a repair process with removal and color matching.
Key Takeaways
- Replace pavers that are cracked, rocking, badly chipped, or creating trip hazards; minor chips on stable units may be suitable for paver repair.
- Inspect and rebuild the base when pavers are sunken, uneven, or shifting, because polymeric sand cannot correct unstable support or drainage problems.
- Match replacement pavers by manufacturer, size, thickness, texture, and color blend, and clean the surrounding area before comparing weathered surfaces.
- Refill joints carefully with compatible joint sand or polymeric sand, then wait until the surface and sand are completely dry before paver sealing.
- Professional paver restoration is recommended for widespread movement, drainage concerns, failing borders, chemical stains, or repairs involving multiple units.
When a Paver Needs Repair or Full Replacement
Not every mark on a paver patio requires a new paver. Light surface dirt, algae, faded sealer, and small stains on weathered brick pavers can often be handled through careful paver cleaning. A shallow chip on a stable concrete paver may be suitable for paver repair with a concrete repair putty stick made for masonry surfaces.
A crack that runs through the paver is different. I recommend replacement when the unit is split, rocking, badly chipped, missing a corner, or raised enough to create trip hazards. A repair product may hide a small defect, but it won’t correct movement or restore a paver that has lost its structural strength.
Look closely at the area around the damaged unit. These signs point to a larger problem:
- Sunken pavers appear lower than the surrounding units.
- Uneven pavers create noticeable changes in height.
- Joint sand is missing or washing away.
- Water collects after rain.
- The edge restraints have moved or separated.
- The support beneath the paver feels loose.
- Roots, poor water flow, or repeated vehicle loads are pushing the surface.
A cracked paver is often the visible part of the problem. The loose support underneath is what causes the damage to return.
Florida homes commonly deal with heavy rainfall, standing moisture, mold, and strong sun. In colder climates, freeze and thaw cycles can lift and split pavers as trapped water expands and contracts. The repair should address the reason for the movement, not only the broken brick.
Broken Paver Replacement: A Safe Removal Process
An individual-unit paver repair can usually be completed without disturbing the entire paver patio. I work slowly through the repair process to protect neighboring units and preserve the original pattern.
- Photograph the layout before removal. I check the pattern, orientation, joint width, and color around the damaged area. For brick pavers with a special edge or texture, I take one to a supplier for comparison.
- Remove the joint sand around the paver. A narrow screwdriver, hand brush, or joint scraper can clear the seams. I avoid prying against neighboring pavers because a small chip can turn one replacement into several.
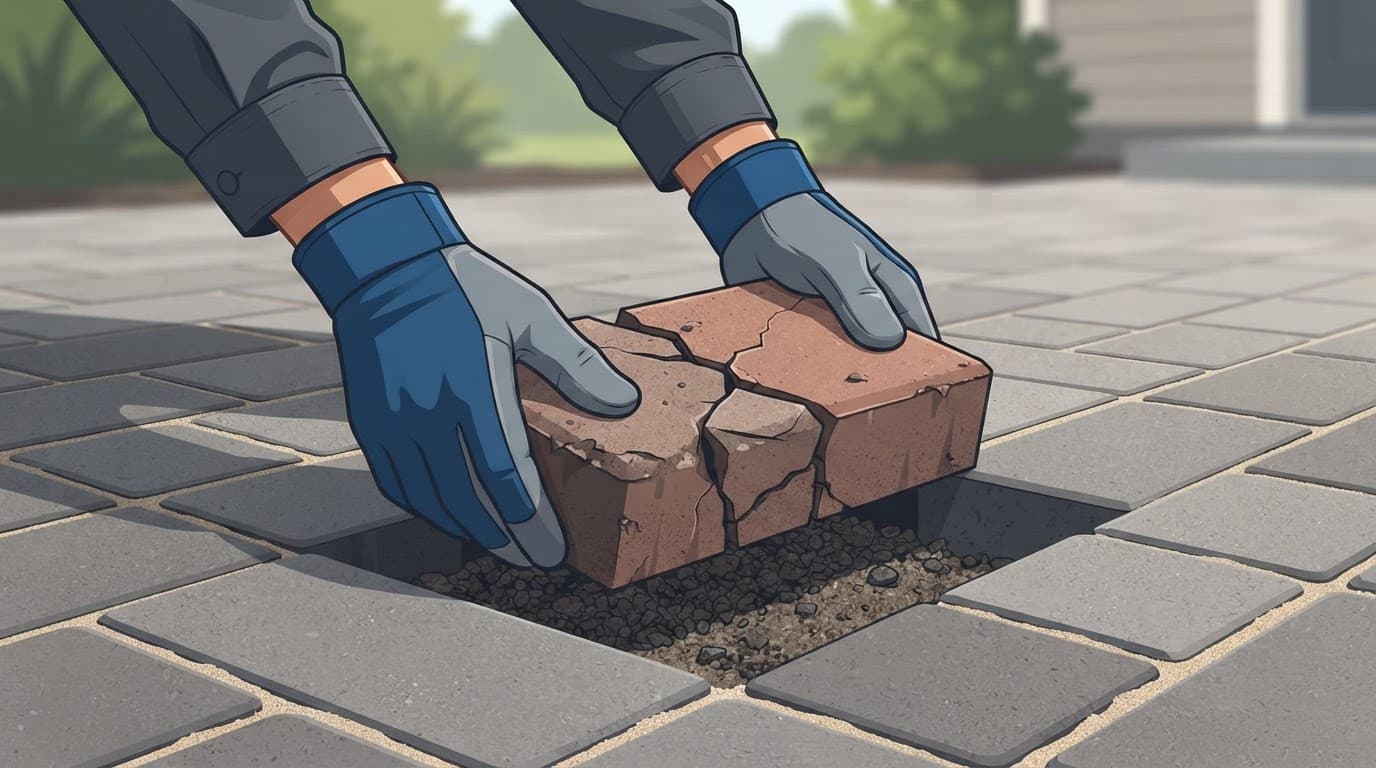
- Lift the damaged unit carefully. Paver pullers can help with some installations. For a cracked piece, I may break it inward with a cold chisel and remove the sections one at a time. Eye protection and gloves are important during this step.
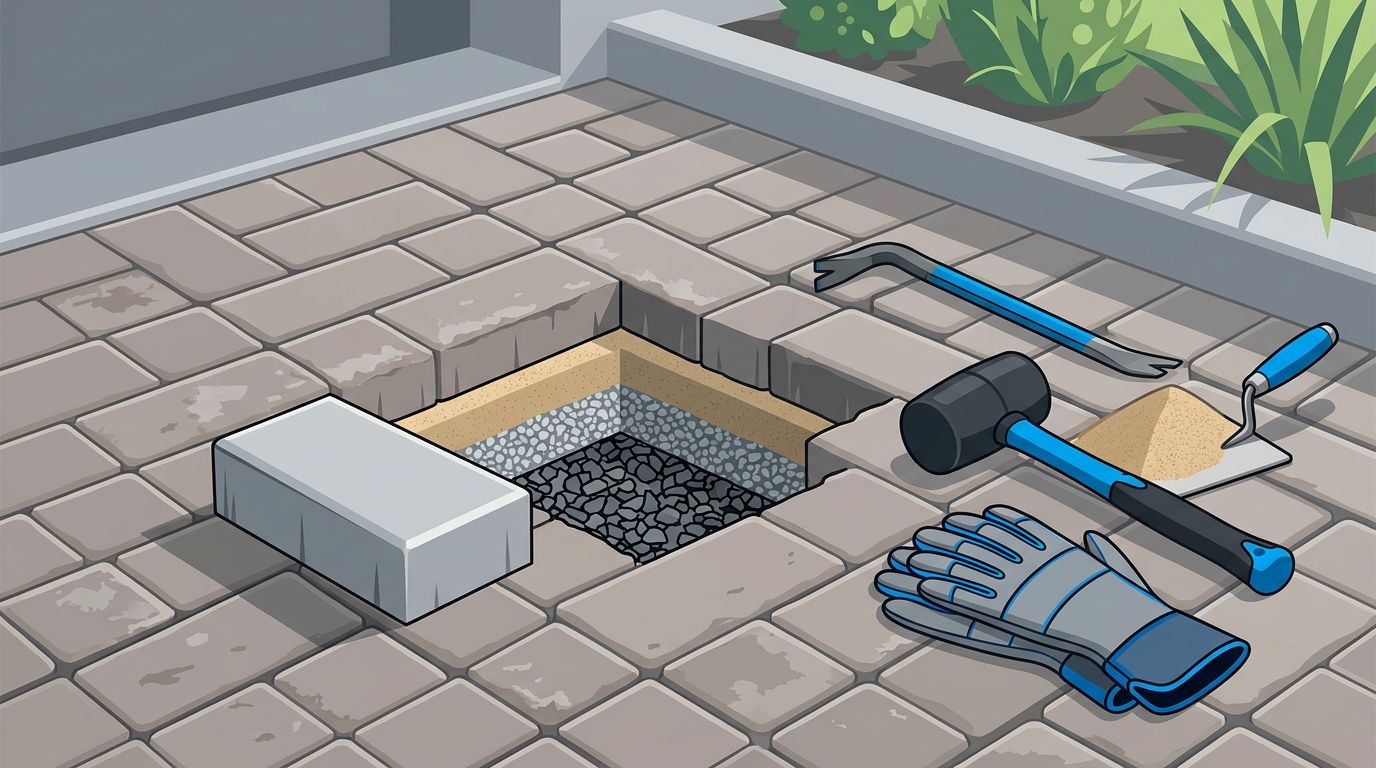
- Inspect and clean the cavity. Loose sand, broken fragments, and wet base material need to come out. If the cavity is deeper than the surrounding bedding layer, I inspect the sub-base before installing anything new.
- Rebuild the base in thin layers. I add compatible base material, compacting each layer instead of filling the hole all at once. A thin layer of compacted sand goes on top, but it is not a substitute for a properly rebuilt base. The surface should finish at the same height as the surrounding pavers, not above them.
- Set the replacement paver. I place it into the pattern and tap it with a rubber mallet. The paver should sit firmly without rocking. I check the slope and joint spacing before adding sand.
- Refill and stabilize the joints. Joint sand fills narrow gaps around the new unit and supports joint stabilization. Polymeric sand can be used when the surrounding installation and product instructions support it. I check the completed paver repair for movement and consistent spacing before watering. The pavers must be dry, the joints must be filled properly, and watering should be light and controlled.
Polymeric sand is not a substitute for a weak base. It helps lock the joints, reduce weed growth, and limit sand loss, but it cannot stop a paver from sinking when water has washed out the material underneath.
Matching Replacement Pavers to Weathered Surfaces
Color matching takes more than choosing a paver that looks similar in a store. On a paver patio, it is part of a successful paver repair. Weathered brick pavers can look different as sun exposure, rain, cleaning, sealer, age, and mineral deposits change them over time.
I start by looking for leftover pavers from the original installation. A garage, shed, side yard, or unused stack may hold the closest match for existing brick pavers. If none are available, I take a clean sample to a local supplier. I compare replacement pavers by manufacturer, shape, thickness, texture, and blend. Concrete pavers and polymeric sand can also affect the repair’s perceived color.
New brick pavers often look brighter than weathered surfaces, so I compare them beside several surrounding units. That doesn’t always mean the match is wrong. A new unit may weather over time, but I don’t rely on aging alone when the difference is strong.
For a small repair, I may spread matched brick pavers through the surrounding area instead of grouping new pieces. Cleaning the entire section can also help. A dirty old paver beside a clean new paver creates more contrast than two clean surfaces.
I don’t use dark sealer to hide a poor match. Paver sealing can deepen color, but it won’t recreate the original blend or natural color. Let the existing blend guide the repair, not a uniformly dark coating. Always test a product in an inconspicuous area first, especially on travertine, clay brick, or pavers with an existing coating.
Fixing Sunken Pavers and Uneven Patio Areas
A low area in a paver patio often needs more than a simple paver repair. Heavy rain can move joint sand and wash fine material from the base. Drainage problems can leave the soil wet and unstable. Repeated surface traffic and freeze and thaw cycles can shift one section more than another.
I remove the affected pavers and examine the depth and condition of the base. For soft, muddy, or missing support, I add base material and compact each layer before leveling pavers to grade. Compacted sand belongs in the bedding layer, while concrete repair cannot fill a void or correct an unstable base. Simply adding sand beneath a low paver is a short-term fix that often leaves the same dip after the next storm.
Edge restraints matter when a shifting border pushes outward and causes the interior brick pavers to spread. I reset or repair the edge restraints before reinstalling the pavers, tapping each into place with a rubber mallet. Once the surface is dry and stable, I install polymeric sand in the joints; however, polymeric sand can’t compensate for a failed base.
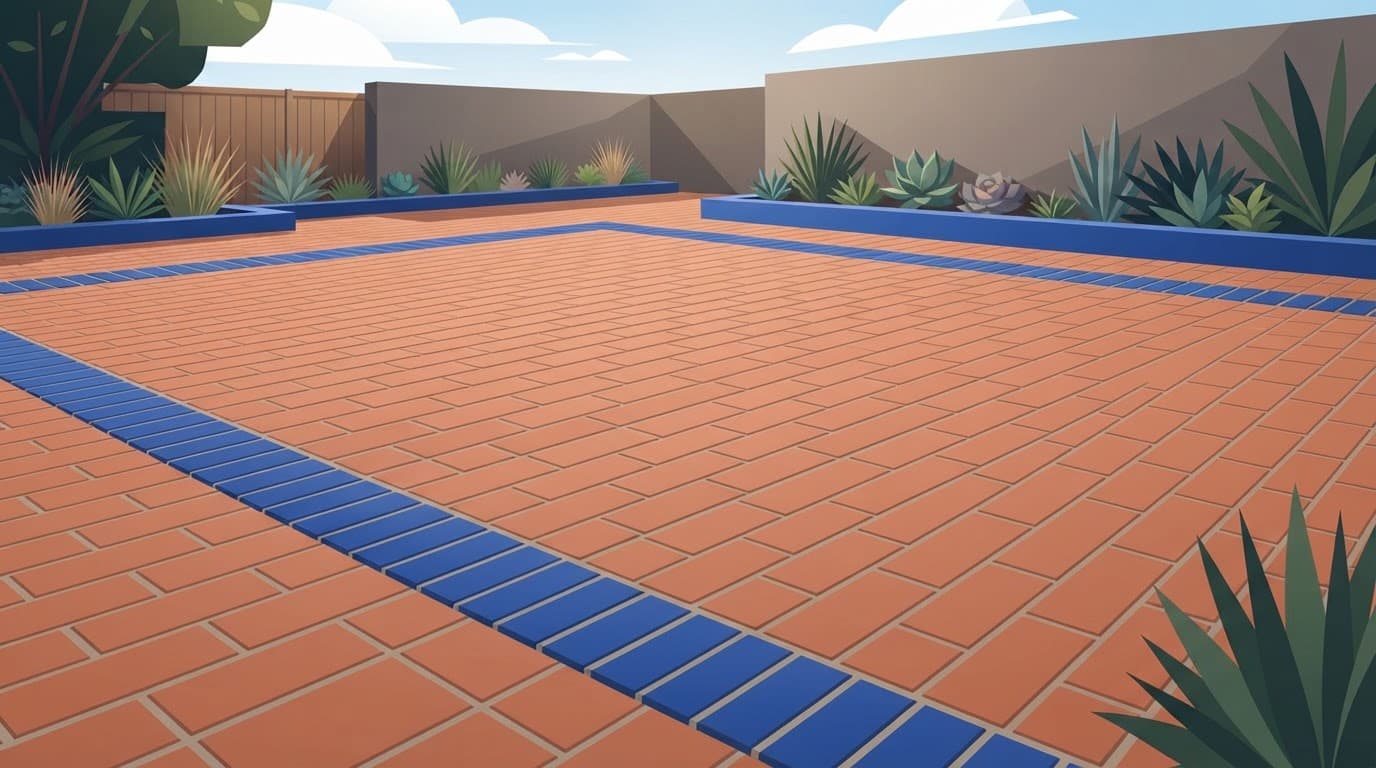
After leveling, I check that water moves away from the home and does not sit against walls, pool decks, or walkways. Reinstalled brick pavers should feel solid underfoot and blend with surrounding units without a lip that creates trip hazards.
Paver Cleaning Before Choosing a Replacement
Cleaning should happen before color matching whenever possible, and paver cleaning should cover the full affected section. Dirt, algae, moss, fertilizer, palm berry residue, rust, and old sealer can all change the way a paver looks.
I clean the full affected section instead of treating one spot and leaving a visible bright patch. For organic growth, the correct cleaner and dwell time usually matter more than excessive force. A soft wash is useful on delicate areas and for removing biological growth without relying on harsh pressure.
A controlled pressure wash can help remove loosened grime from pavers, but the method must be controlled. I prefer a wide spray pattern, appropriate chemical treatment, and a surface cleaner on flat areas while protecting polymeric sand in the joints. A narrow nozzle used during a pressure wash can etch the brick face when held too close, leave lines, strip old sealer, or remove too much material.
Chemical damage needs a careful inspection because brick pavers can hold discoloration in their pores. Fertilizer, solvent, oil, and strong cleaners can discolor or soften a sealer. A removable stain may clean away, but a deeper defect may need a concrete repair product. Heat marks, such as cigarette burns, may leave permanent damage in the pores. Before paver sealing, the surface must be clean. I never seal over a burn or stain because coating can trap discoloration beneath it.
Paver Sealing and Maintaining the Repaired Area
Paver sealing should wait until the replacement and surrounding surface are clean and completely dry. If polymeric sand was added, allow it to cure fully before sealing. Sealing too soon can trap moisture, create a cloudy finish, or make new and old pavers appear even more different.
Many homeowners schedule paver sealing every few years, but the right interval depends on sun, rain, traffic, product type, and the condition of the existing coating. Check that the product is compatible with polymeric sand before applying it. Florida driveways, lanais, pool decks, and patios receive strong exposure, so regular inspections are more useful than following one fixed calendar.
I also recommend regular paver cleaning, sweeping, and prompt cleanup of fertilizer, oil, leaves, and food spills from brick pavers. Inspect the joints and refill missing joint sand with polymeric sand to help limit weed growth. Paver sealing can protect the surface, but it won’t correct a sinking base or repair a cracked paver.
Roof cleaning is a separate service, and a soft wash is often safer for roof surfaces than a pressure wash. Keeping the roof, gutters, house exterior, and pavers maintained helps prevent dirty runoff from returning to a freshly restored area while the seal cures.
When Professional Paver Restoration Makes Sense
DIY paver repair can work for one loose paver when the base is sound and the replacement is easy to match. Larger restorations are different and may involve multiple low or shifting units, drainage concerns, trip hazards, chemical stains, or a failing border. Multi-cause repairs often call for hardscape professionals, while damage beyond the paved surface may require a broader masonry evaluation and concrete repair.
At Kingsway Paver Sealing & Pressure Cleaning, I help homeowners in Fort Myers, Naples, Bonita Springs, Port Charlotte, Sanibel Island, and nearby Southwest Florida communities with paver cleaning, restoration, re-leveling, driveway restoration, and re-sanding with polymeric sand when appropriate. I also pressure wash brick pavers and select polymeric sand when joints need durable stabilization.
If you’re unsure whether your surface needs cleaning, repair, or full broken paver replacement, Get a Quote for a clear evaluation of the area.
Frequently Asked Questions
Can a cracked paver be repaired instead of replaced?
A shallow chip on a stable concrete paver may be suitable for paver repair with a masonry repair product. A paver that is split, rocking, or structurally weakened should usually be replaced.
How do I match a new paver to weathered brick pavers?
Start with leftover pavers from the original installation and compare samples by manufacturer, shape, thickness, texture, and color blend. Clean the surrounding area before comparing, since dirt, algae, old sealer, and sun exposure can make a close match look different.
Why do pavers become sunken or uneven?
Sunken pavers can result from washed-out base material, poor drainage, loose soil, shifting edge restraints, roots, heavy traffic, or freeze and thaw cycles. The affected area should be removed and the underlying base rebuilt and compacted in layers.
Can polymeric sand fix a weak paver base?
No. Polymeric sand helps stabilize joints, reduce weed growth, and limit sand loss, but it cannot support a paver over a failed or missing base.
When should I seal the repaired paver area?
Wait until the replacement and surrounding pavers are clean and completely dry, and allow any new polymeric sand to cure fully. Sealing too soon can trap moisture, create a cloudy finish, or increase the color difference between new and weathered pavers.
A Stronger Repair Starts Below the Paver
The best repair is more than a new brick placed into an old hole. Complete paver restoration requires a stable base, sound borders, polymeric sand, careful color matching, and drying time for paver sealing.
When I inspect a damaged patio or driveway, I look at the whole installation and correct the cause before planning paver repair. A repair process that addresses the base first helps the new unit stay level. It also helps it match surrounding brick pavers and look right for years.
