
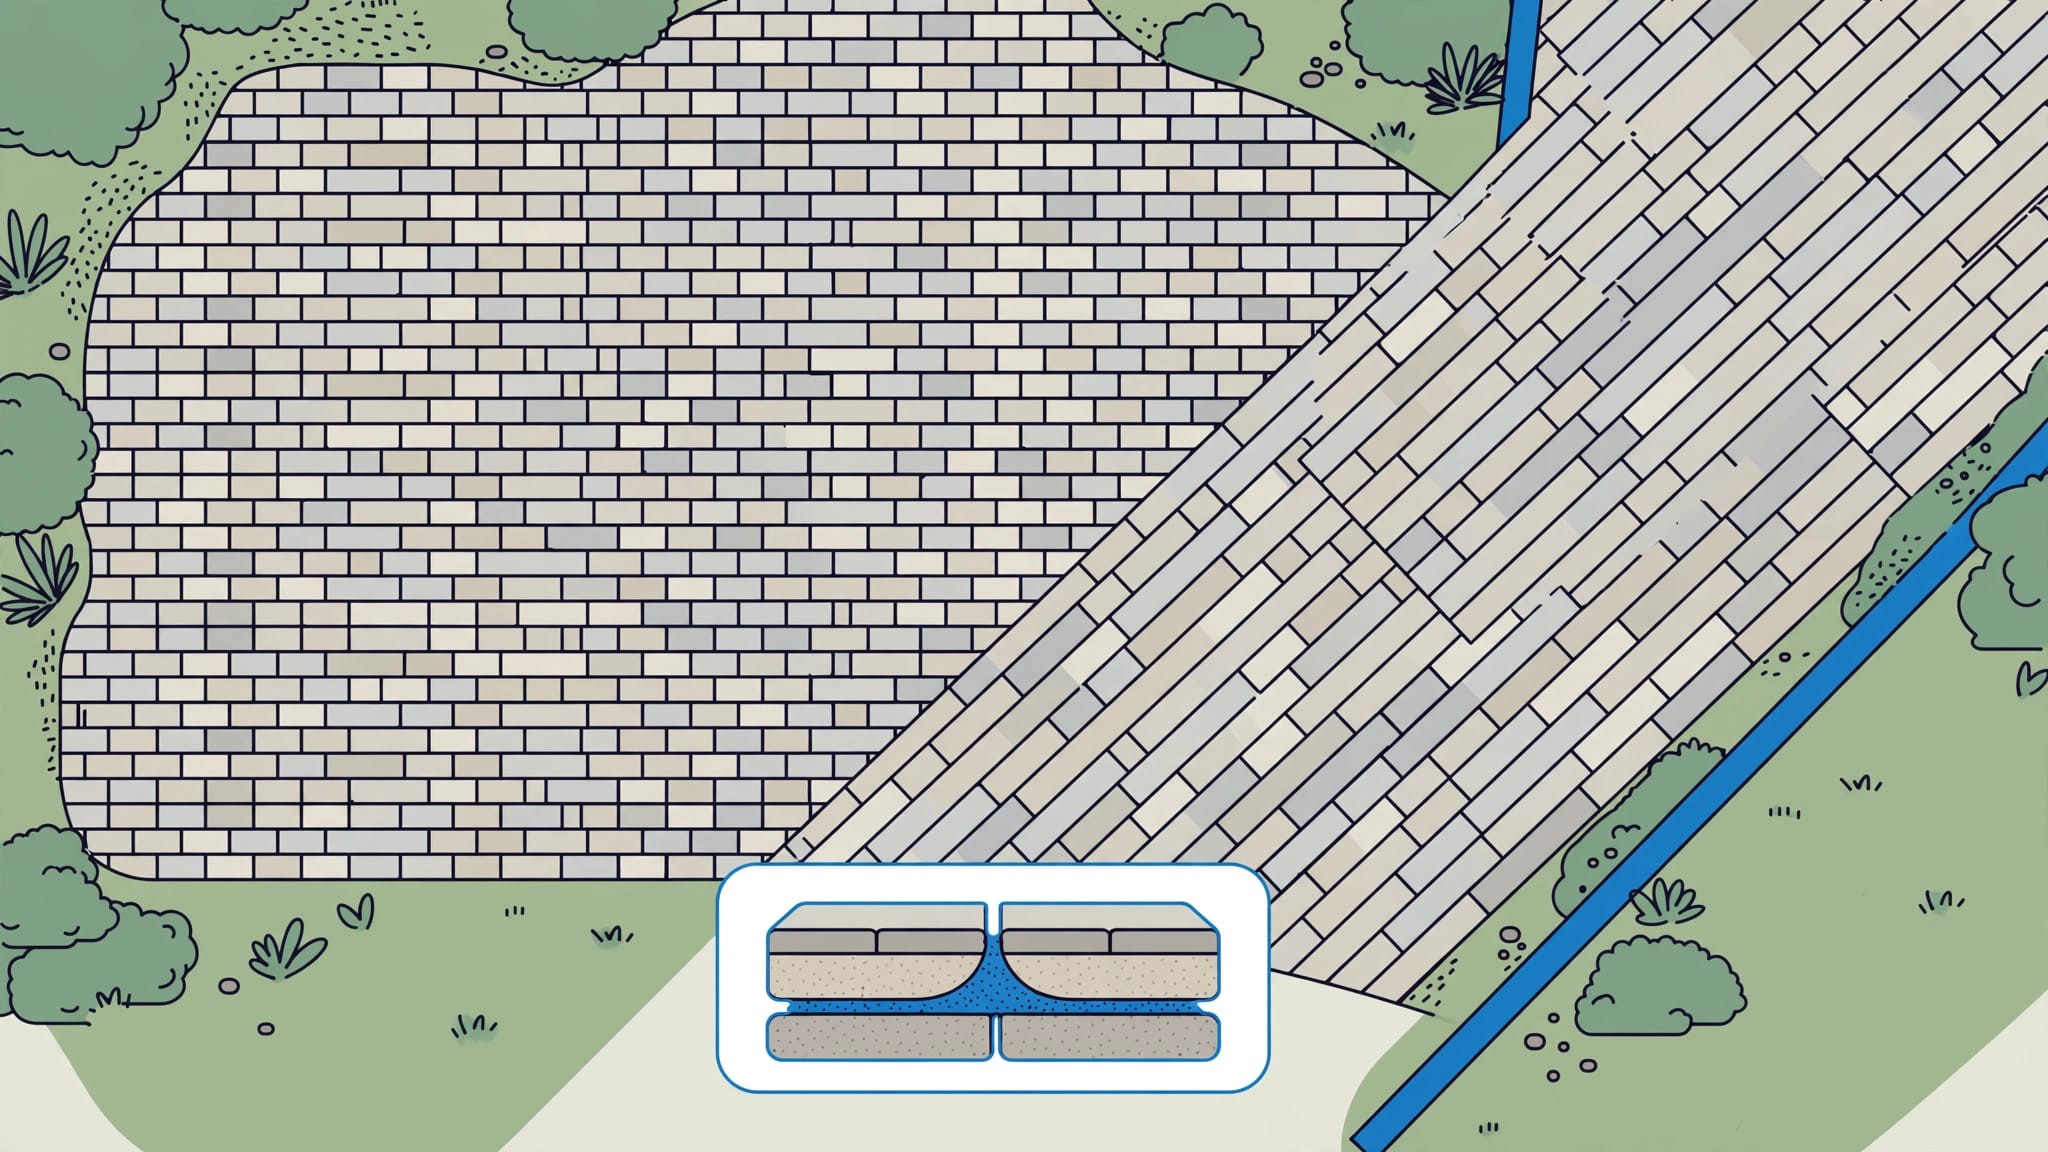
For conventional driveways and patios, paver joint width typically runs 1/16 to 3/16 inch, with about 1/8 inch most common. The suitable gap depends on the paver’s profile and manufacturer-approved system, not appearance alone.
A driveway needs a vehicle-rated paving system, while a patio may be pedestrian-rated, but neither automatically needs wider gaps. Check product-specific requirements for bluestone rather than assuming it uses the same gap as interlocking concrete pavers. Permeable paving needs a different approach, so identify your installation first.
Key Takeaways
- About 1/8 inch is common for conventional pavers.
- Polymeric sand must match the joint width and installation depth.
- Permeable systems use drainage stone rather than polymeric sand.
- Proper compaction, drying, and curing protect the finished surface.
Choose Paver Joint Width and Filler Together
Use these ranges to separate conventional paving from drainage systems.
| Installation | Joint width | Joint filler | Depth and compaction |
|---|---|---|---|
| Conventional driveway or patio | 1/16 to 3/16 inch | Compatible jointing sand | Full paver depth; compact before activation |
| Wider decorative joints | Product-dependent, often 1/4 to 1.5 inches | Wide-joint polymeric sand | Full depth; compact as directed |
| Permeable paving | Commonly 1/4 to 1/2 inch | Angular chip stone | Fill and compact to system requirements |
Choose filler based on the measured joint size. It must suit the opening, not determine the layout.
Measure Below the Beveled Edge
Measure between the straight paver sides below the bevel. Decorative grooves, sometimes called a false joint, aren’t full-depth openings.
Measure several locations, including borders. Widening gaps or repeated joint sand washout deserve attention before sealing. I wouldn’t spread existing pavers apart simply to accommodate a different sand.
A narrow joint can be harder to fill fully. Wide joints need filler rated for their opening.
Match Polymeric Sand to the Opening
Choose polymeric jointing sand only when the product specifications accept the measured opening.
Sakrete’s guidance favors joints between 1/4 and 1.5 inches, but that isn’t a universal polymeric-sand range. Wider joints also take longer to harden.
Techniseal’s SmartSand specifications identify 1/16 to 3/8 inch as ideal. HP NextGel covers 1/16 to 1 inch. Their advertised limited warranties are 15 and 20 years, respectively, not guarantees for the entire installation.
A 1/8-inch gap works with suitable sand but takes more effort to fill. Some installers prefer 1/4 inch. Above 1/2 inch, use wide-joint-rated sand, such as Gator Maxx.
What Makes Paver Joints Permeable?
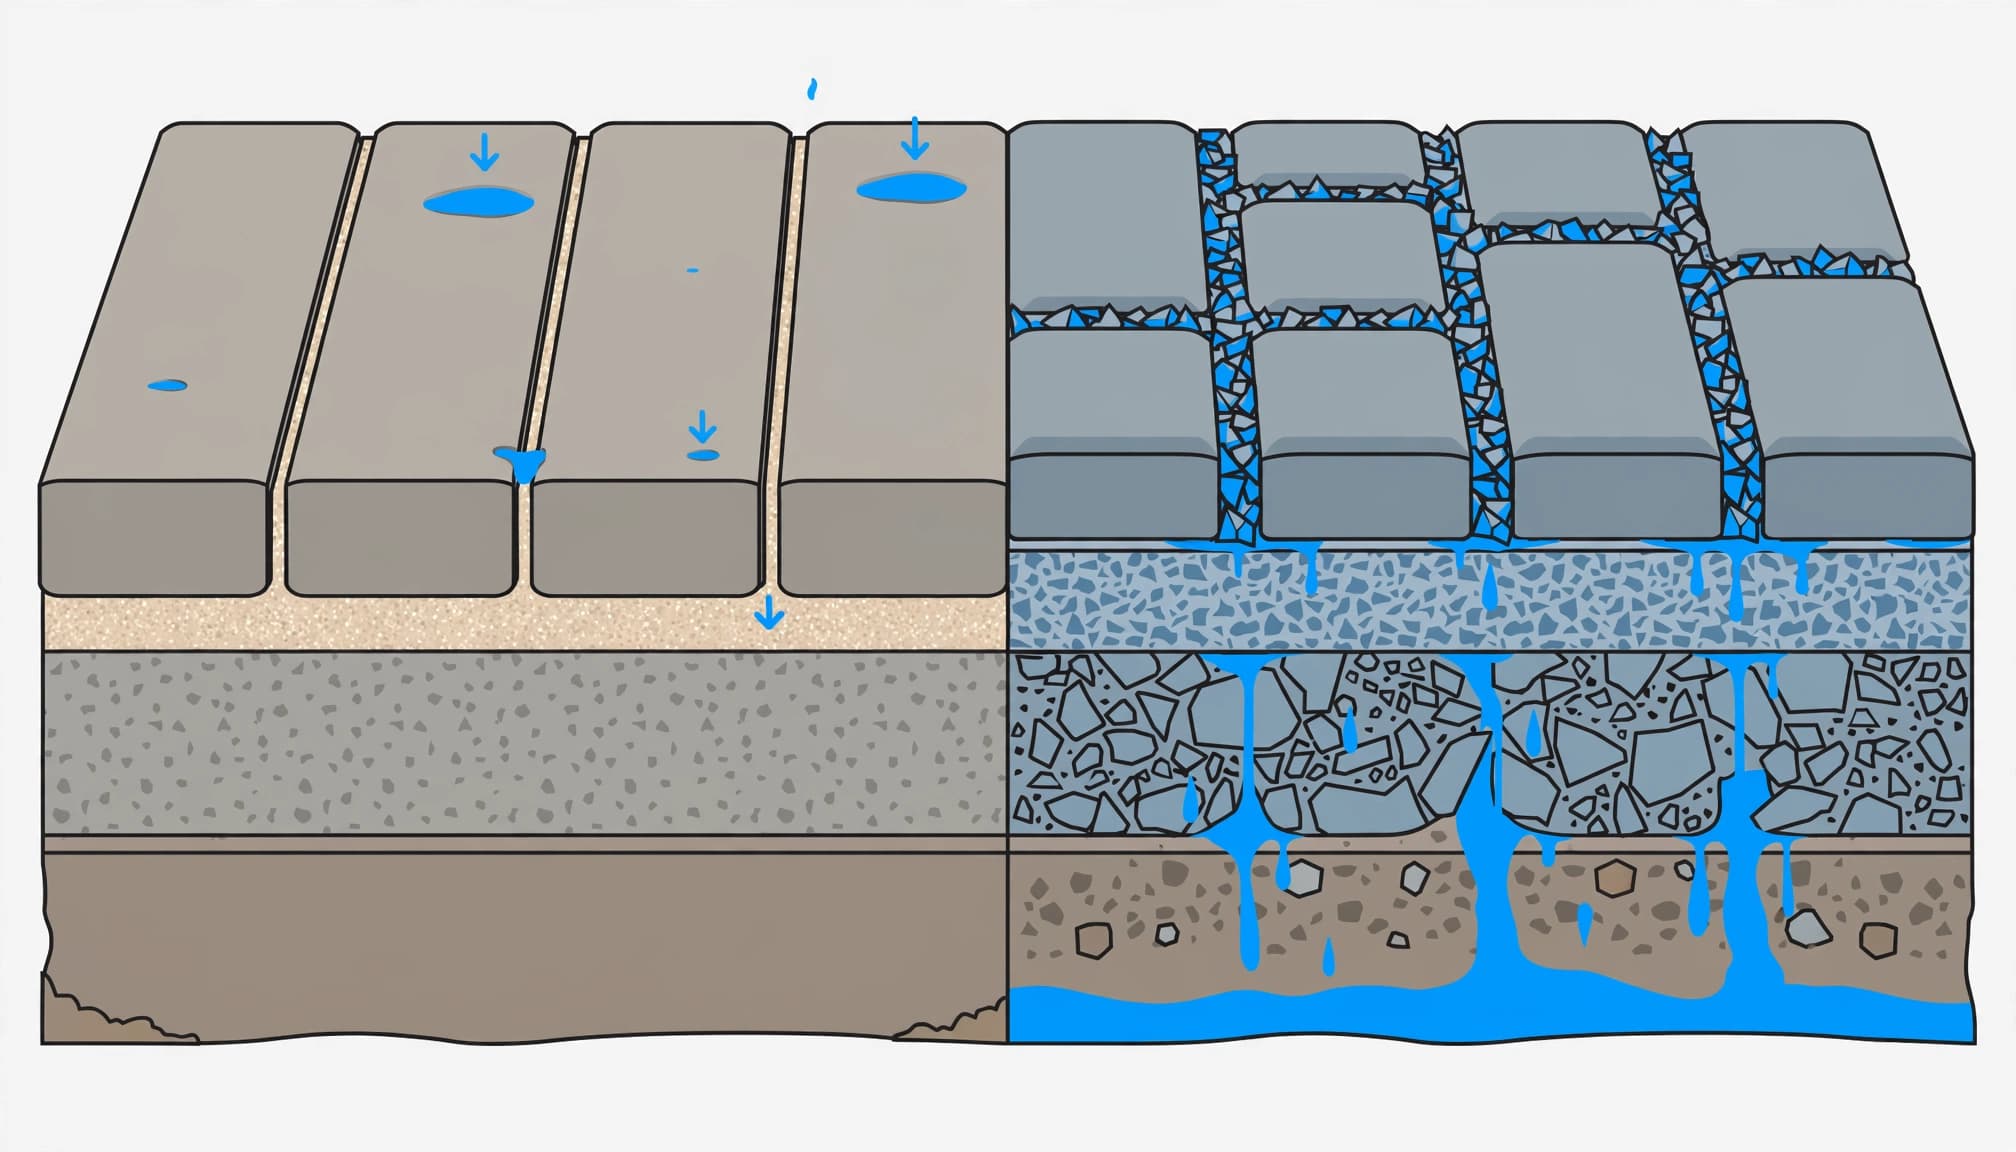
A wider gap alone doesn’t make a non-permeable paver permeable. A permeable paver is designed with drainage joints. Unilock’s permeable-paver definition considers paver joint width, void space, and joint material together.
Its framework calls for joints at least 1/4 inch wide and a void space ratio of at least 4 percent, measured at the paver base. These thresholds describe that framework, not every proprietary permeable product.
The joint fill is crushed angular chip stone. Unilock identifies ASTM #9 stone for joints 1/4 inch or less and ASTM #8 for joints up to 1/2 inch. The supporting layers must also allow drainage.
The surface infiltration rate is tested under ASTM C1781 using a sealed ring and timed water application. Well-installed systems can achieve about 300 to 1,000 inches per hour at the surface. This infiltration rate doesn’t describe how quickly the underlying soil absorbs water. Runoff design should account for local rainfall intensity, the paver system, and underlying drainage.
Install Joint Sand Before Sealing
I put preparation first because fresh sand won’t correct movement, trapped moisture, or poor drainage.
- Remove weeds and old material. For established weeds, apply a non-selective herbicide labeled for the location several days before removal. Protect nearby plants. Remove old sand to the paver bottom without disturbing bedding, as Sakrete’s restoration guide explains.
- Clean and allow complete drying. Pressure washing and polymeric sand installation shouldn’t happen the same day. Pavers and joints must be dry throughout to prevent premature activation and staining. Schedule roof cleaning or a soft wash beforehand, with runoff controlled.
- Fill and compact the joints. Sweep dry sand through the full paver depth. Use a protective-mat plate compactor where the pavers permit it, then refill and repeat. Inspect an accessible edge joint for full-depth fill. Finish about 1/8 inch below the paver top, respecting the product’s specified recess.
- Clear the faces and activate carefully. Sweep away residue, then blow remaining dust across the surface without aiming into joints. Water sections no larger than 10 by 10 feet using the product’s activation directions. Overwatering can float polymers onto the pavers and cause white haze or stains. Too little water leaves weak joints.
- Protect curing before applying sealer. Follow the product directions for cure times. Sakrete calls for at least 24 hours before pedestrian traffic and 72 hours before vehicles. A downpour within 24 to 48 hours can wash out uncured material; protect it with a raised tarp or plastic cover. Apply compatible water-based paver sealer only after hardening and complete drying, usually several days later.
Common Questions About Paver Joints
Can Polymeric Sand Be Applied Twice?
Yes, during dry installation you can refill after compaction before activation. For hardened, failed joints, I recommend removing the failed material to the required depth. A thin layer over old sand won’t provide dependable full-depth bonding.
Will Joint Sand Stop Weeds and Movement?
Properly installed polymeric sand reduces weed growth and erosion. It doesn’t eliminate maintenance. Sweep away dirt and seeds before they collect above the joints.
Filled joints help limit sideways movement, but secure edging and a compacted base remain necessary. Sand can’t support pavers over failing ground.
Protect the Joints Before Protecting the Surface
For most conventional installations, about 1/8 inch is a practical starting point. Compatible filler and complete installation matter as much as the gap itself.
I recommend completing repairs, sanding, drying, and curing before driveway sealing. For help restoring and protecting your driveway or patio, Get a Quote from Kingsway Paver Sealing.