
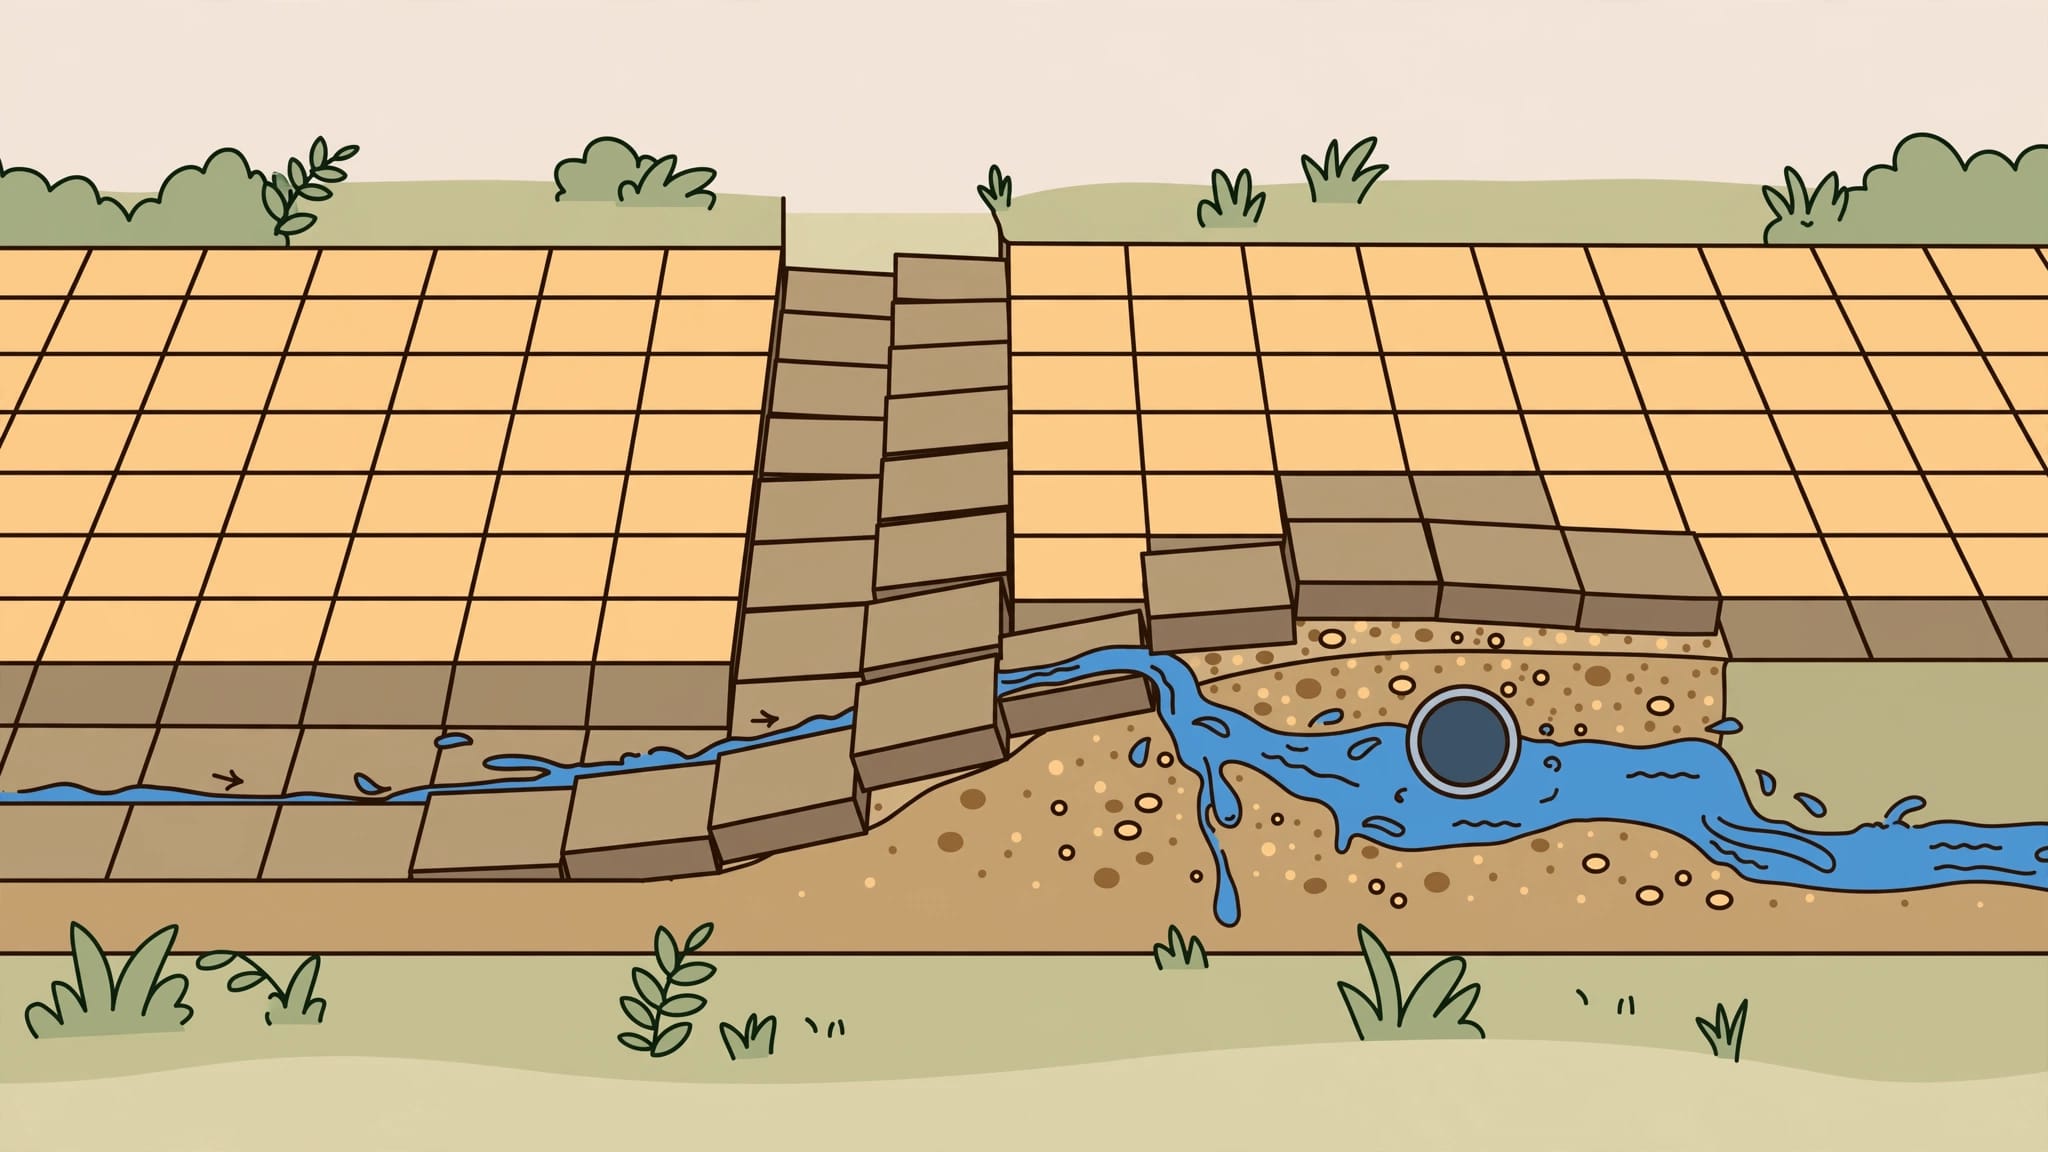
Pavers shift after underground utility work when trench backfill settles, the rebuilt base lacks compaction, or runoff washes away support. The hardscape may look level when the work ends, but rain and normal traffic can expose weak areas underneath.
I recommend addressing the support beneath the pavers before adding joint sand or scheduling sealing. A lasting repair starts with understanding what changed along the utility route.
Why Utility Trenches Lead to Paver Shifting
Installing or repairing water, electrical, irrigation, or runoff-management lines disturbs soil that previously supported the pavement. Putting the pavers back doesn’t automatically restore that support.
Loose backfill settles under the surface
Excavated soil contains loose pockets when it’s returned to a trench. Without suitable material and thorough compaction, those pockets compress under moisture and traffic.
A narrow depression following the pipe route is a useful clue. It suggests the disturbed strip is settling differently from the surrounding ground.
The Federal Highway Administration’s pavement foundation guidance addresses the relationship between soil conditions, compaction, and pavement support. Rebuilding only the shallow setting layer leaves deeper weaknesses untreated.
Utility access can disturb neighboring pavers
Work beside a paved area can also remove support along its edge. Equipment, excavation, and displaced restraints may loosen pavers beyond the actual trench.
I would compare the affected strip with nearby joints and borders. Widening gaps or a shifting outer row can show that the repair needs to extend beyond the lowest paver.
Our guide to the causes of shifting brick pavers covers other problems that can occur alongside trench settlement.
Water Makes Weak Support Worse
A utility trench can change how moisture travels beneath a driveway or patio. Surface flow and underground support need attention together.
Rain can wash material out
Concentrated runoff can enter open joints, move fine material, and soften the soil below. A leaking irrigation line can keep the same area wet during dry weather.
In Southwest Florida, heavy rain and recurring saturation deserve close attention. Deposited bedding material, a growing depression, or wetness that follows an irrigation cycle can help distinguish washout from ordinary surface wear.
Runoff should leave the paved area through a clear flow path rather than collect beside the foundation.
Freeze-thaw cycles can cause heaving
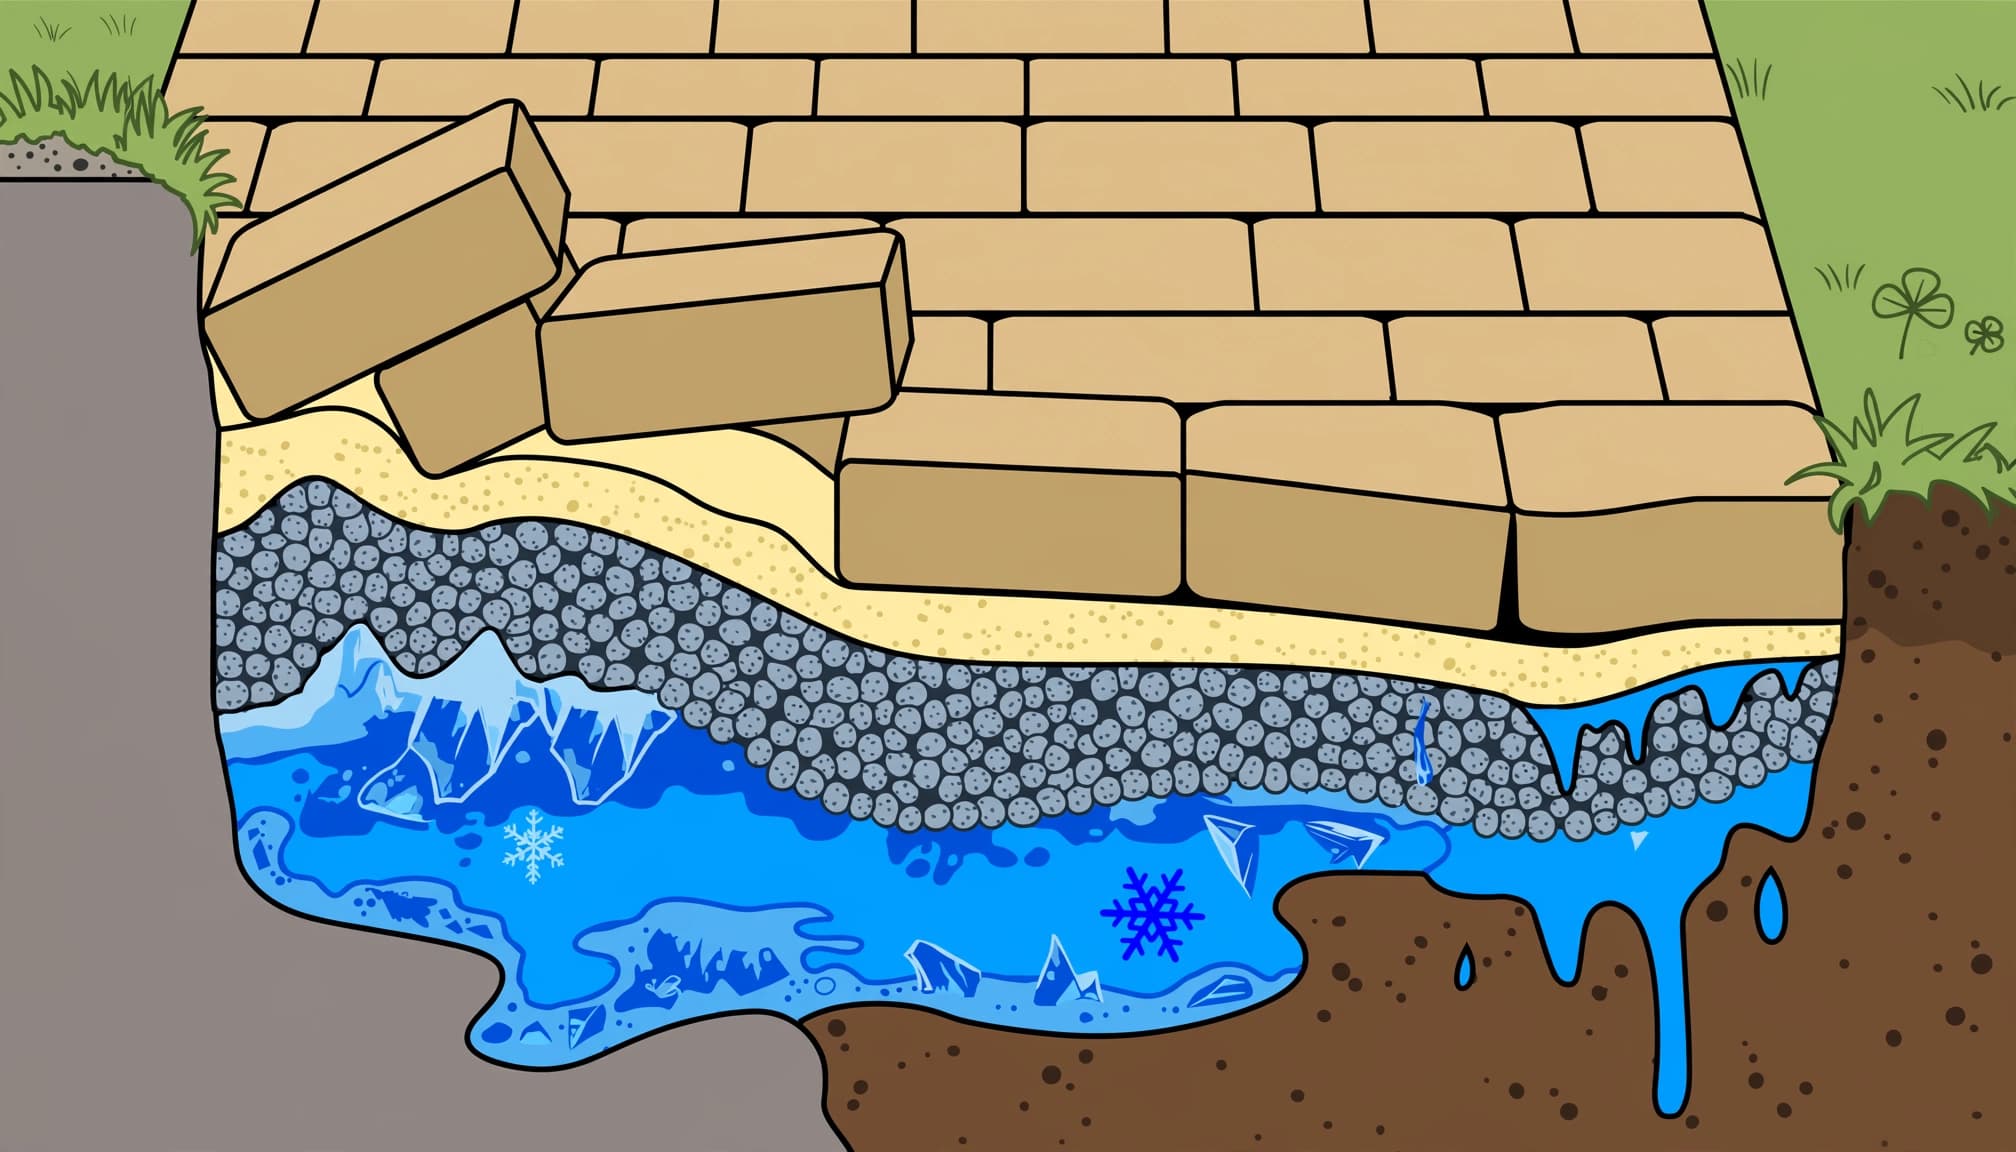
In colder climates, freeze-thaw damage starts with moisture and depends on temperature. Trapped water freezes and expands, and ice in susceptible soil lifts the surface. This upward movement is called heave.
After thawing, weakened soil can settle unevenly. Repeated cycles can cause another heave and lift pavers unevenly, leaving rocking pavers and depressions that collect more runoff.
Transportation research on frost-resistant pavement foundations identifies freezing temperatures, available water, and frost-susceptible soil as the conditions behind frost formation.
A Stable Repair Starts Below the Surface
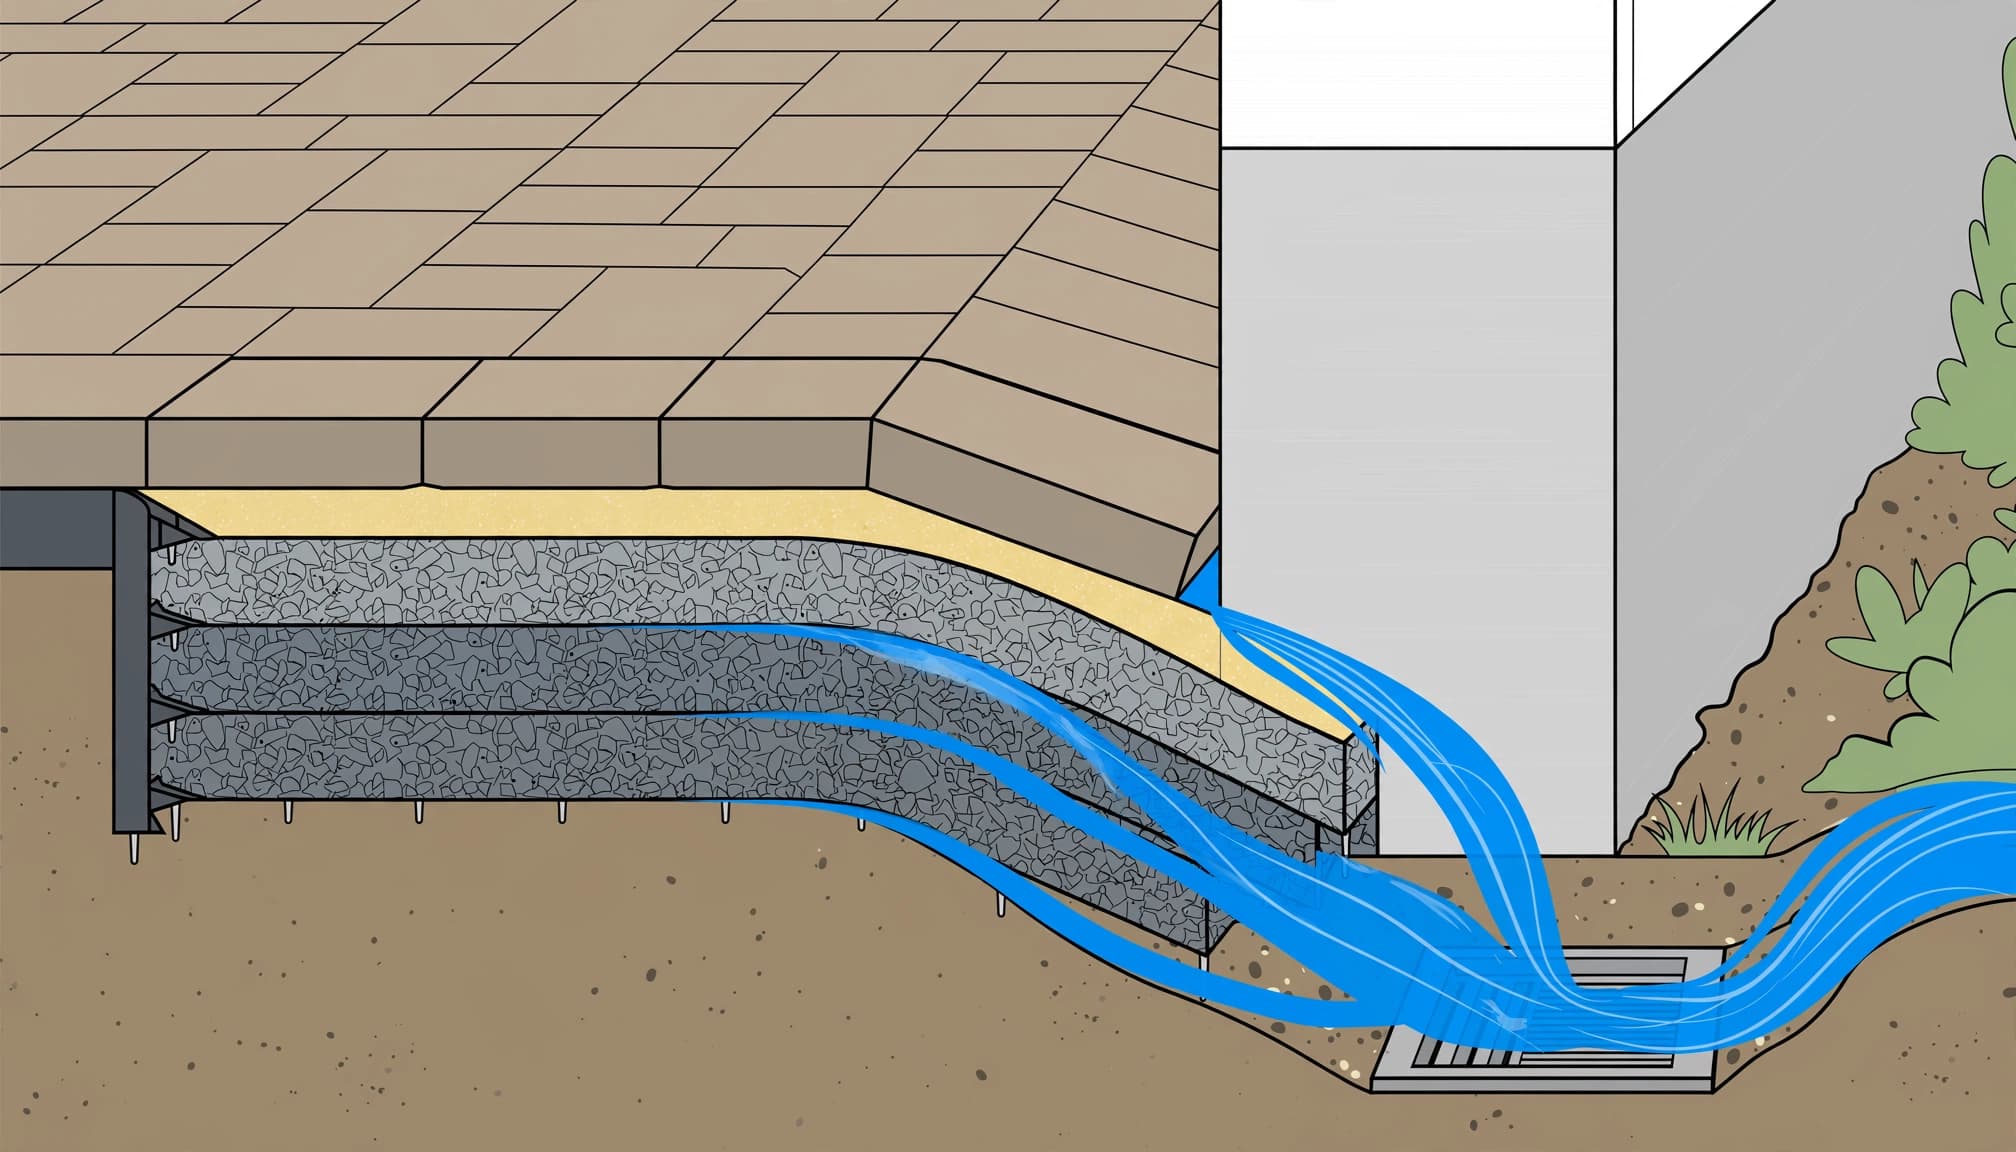
A dependable paver system needs three things: a way for water to drain, compacted support, and a secure arrangement of bedding sand, joints, and edges.
Establish the grade and rebuild firm support
Evaluate grading and soil stability before choosing a paver pattern or replacement material. A new surface won’t stay even over soft backfill.
Build a proper base over a compacted subgrade. Place compatible aggregate in manageable layers, and compact each layer before adding the next. Filling one deep cavity and compacting only the top can leave loose support underneath.
Correct low spots in the granular material itself. Where weak soil could mix with the stone, an appropriate separation fabric may be part of the repair design.
Keep bedding sand thin and consistent
Bedding sand provides the setting layer above a stable base. It isn’t structural fill for a deep depression or washed-out cavity.
The ICPI bedding-sand specification identifies concrete sand meeting ASTM C33 or CSA A23.1. Clean, washed material with suitable grading is preferable to fine masonry sand for this bedding application.
Extra bedding sand can shift and remain wet. A paver raised with a thick patch may sink again after the next storm.
Joint Sand and Edges Keep Pavers Together
Joint fill and edge restraints help installed pavers resist movement. Neither can replace missing support beneath the pavement.
Properly graded joint sand contains a suitable range of particle sizes that pack into the gaps. Angular grains resist movement, but the material must also fit the joint width.
Silica sand isn’t suitable based on silica content alone. Grading and fit with the joint width also matter. Very uniform material can migrate more readily, while ordinary joint fill can wash out under concentrated runoff.
The CMHA’s base installation guide notes that ASTM C33 material may require additional sweeping and compaction to fill joints completely.
Polymeric joint fill contains binders that firm up after correct installation and activation. It can improve joint stability when compatible with the pavement, but it won’t hold a failing base together.
Borders deserve the same attention. Loose or unsupported edge restraints let the outside row move outward, opening joints farther into the pavement.
I recommend correcting paver edge spreading before restoring the interior joints. Otherwise, fresh joint fill may disappear into gaps that keep widening.
What Homeowners Should Inspect After Utility Work
Start with the shape of the affected area. A straight sunken strip suggests trench settlement. Several disconnected depressions suggest a broader support problem or a change in where runoff flows.
Photograph the surface from the same position over time. Include nearby drains, utility boxes, borders, and downspouts so changes are easier to compare.
A practical inspection should cover these conditions:
- Look for pooled runoff after rain and note whether it follows the excavated route.
- Make sure downspouts discharge away from the hardscape instead of repeatedly soaking one edge.
- Watch for widening joints, outward-moving borders, and pavers that rock underfoot.
- Compare wetness after irrigation with wetness after rainfall to help identify the water source.
Sunken or wavy pavers are warning signs of lost support. Nearby concrete cracks may also warrant inspection, although cracks alone don’t prove the utility work caused the problem.
Keep people and vehicles away from sharply sunken or unstable sections. An enlarging cavity, persistent leak, or movement around a utility box needs professional attention. Don’t reach into unfamiliar utility equipment or begin digging around buried lines.
How Shifted Pavers Should Be Repaired
A small, localized problem may allow a focused repair. Widespread movement, recurring washout, or several failed edges calls for a larger assessment.
I recommend lifting enough pavers to reach dependable support rather than repairing only the lowest unit. Sound pavers can often be reused, which helps preserve the existing pattern and appearance.
The repair sequence should address the full assembly:
- Carefully remove the affected pavers and inspect the bedding, granular base material, surrounding edges, and trench area.
- Remove failed material and correct leaks, concentrated runoff, or blocked drainage before rebuilding.
- Restore compatible aggregate in compacted layers while protecting buried utilities and access boxes.
- Install a consistent bedding layer and reset the pavers to the surrounding grade and pattern.
- Complete suitable final seating and refill the joints with compatible material, following any activation requirements.
The finished area should feel firm without rocking or abrupt height changes. Water should move away from the house without collecting along the repaired strip.
Our information on repairing loose or uneven pavers explains why the base condition matters during a reset.
Pressure washing should wait until unstable areas are repaired. Driveway sealing can protect the prepared finish, but it won’t correct settlement, replace stone, or change the surface slope.
Key Takeaways
Utility work can leave loose backfill, disturbed granular support, or unsupported edges beneath an otherwise clean-looking surface.
The priority is stable support and effective runoff control. Joint fill and sealer belong after structural repairs. Resetting reusable pavers can restore a consistent appearance, but recurring movement means the underlying cause still needs attention.
Frequently Asked Questions
Can sand alone fix a low paver?
A minor bedding irregularity over a firm base may need a localized adjustment. A deep cavity, muddy support, or settled trench needs base repair.
Adding extra bedding material beneath the surface can hide the depression temporarily. It won’t restore the strength of missing or poorly compacted base material.
How much does fixing uneven pavers cost?
The scope determines the price. A localized reset requires less work than lifting a driveway section, rebuilding trench support, correcting runoff, and replacing damaged units.
A useful repair estimate separates the affected area, excavation, granular support work, edge repairs, joint material, and any cleaning or sealing. Comparing those items gives you a clearer picture than comparing totals alone.
Can repaired driveway pavers support vehicles?
A properly designed paver driveway can support vehicle traffic. Capacity depends on the complete pavement system, including paver thickness, aggregate depth, soil strength, drainage, and compaction.
There isn’t one weight limit that applies to every installation. A thick paver over weak backfill can still settle. Keep vehicles off a rocking or sunken section until its support is restored.
Restore the Support Before Protecting the Surface
Paver shifting after utility work should be addressed beneath the surface. Correcting disturbed support and water flow gives the reset pavers a dependable foundation.
I recommend completing those repairs before cleaning and sealing. A stable surface comes first, so maintenance protects the finished work.
When your pavers are ready for sealing or pressure cleaning, Get a Quote for those services from Kingsway.