
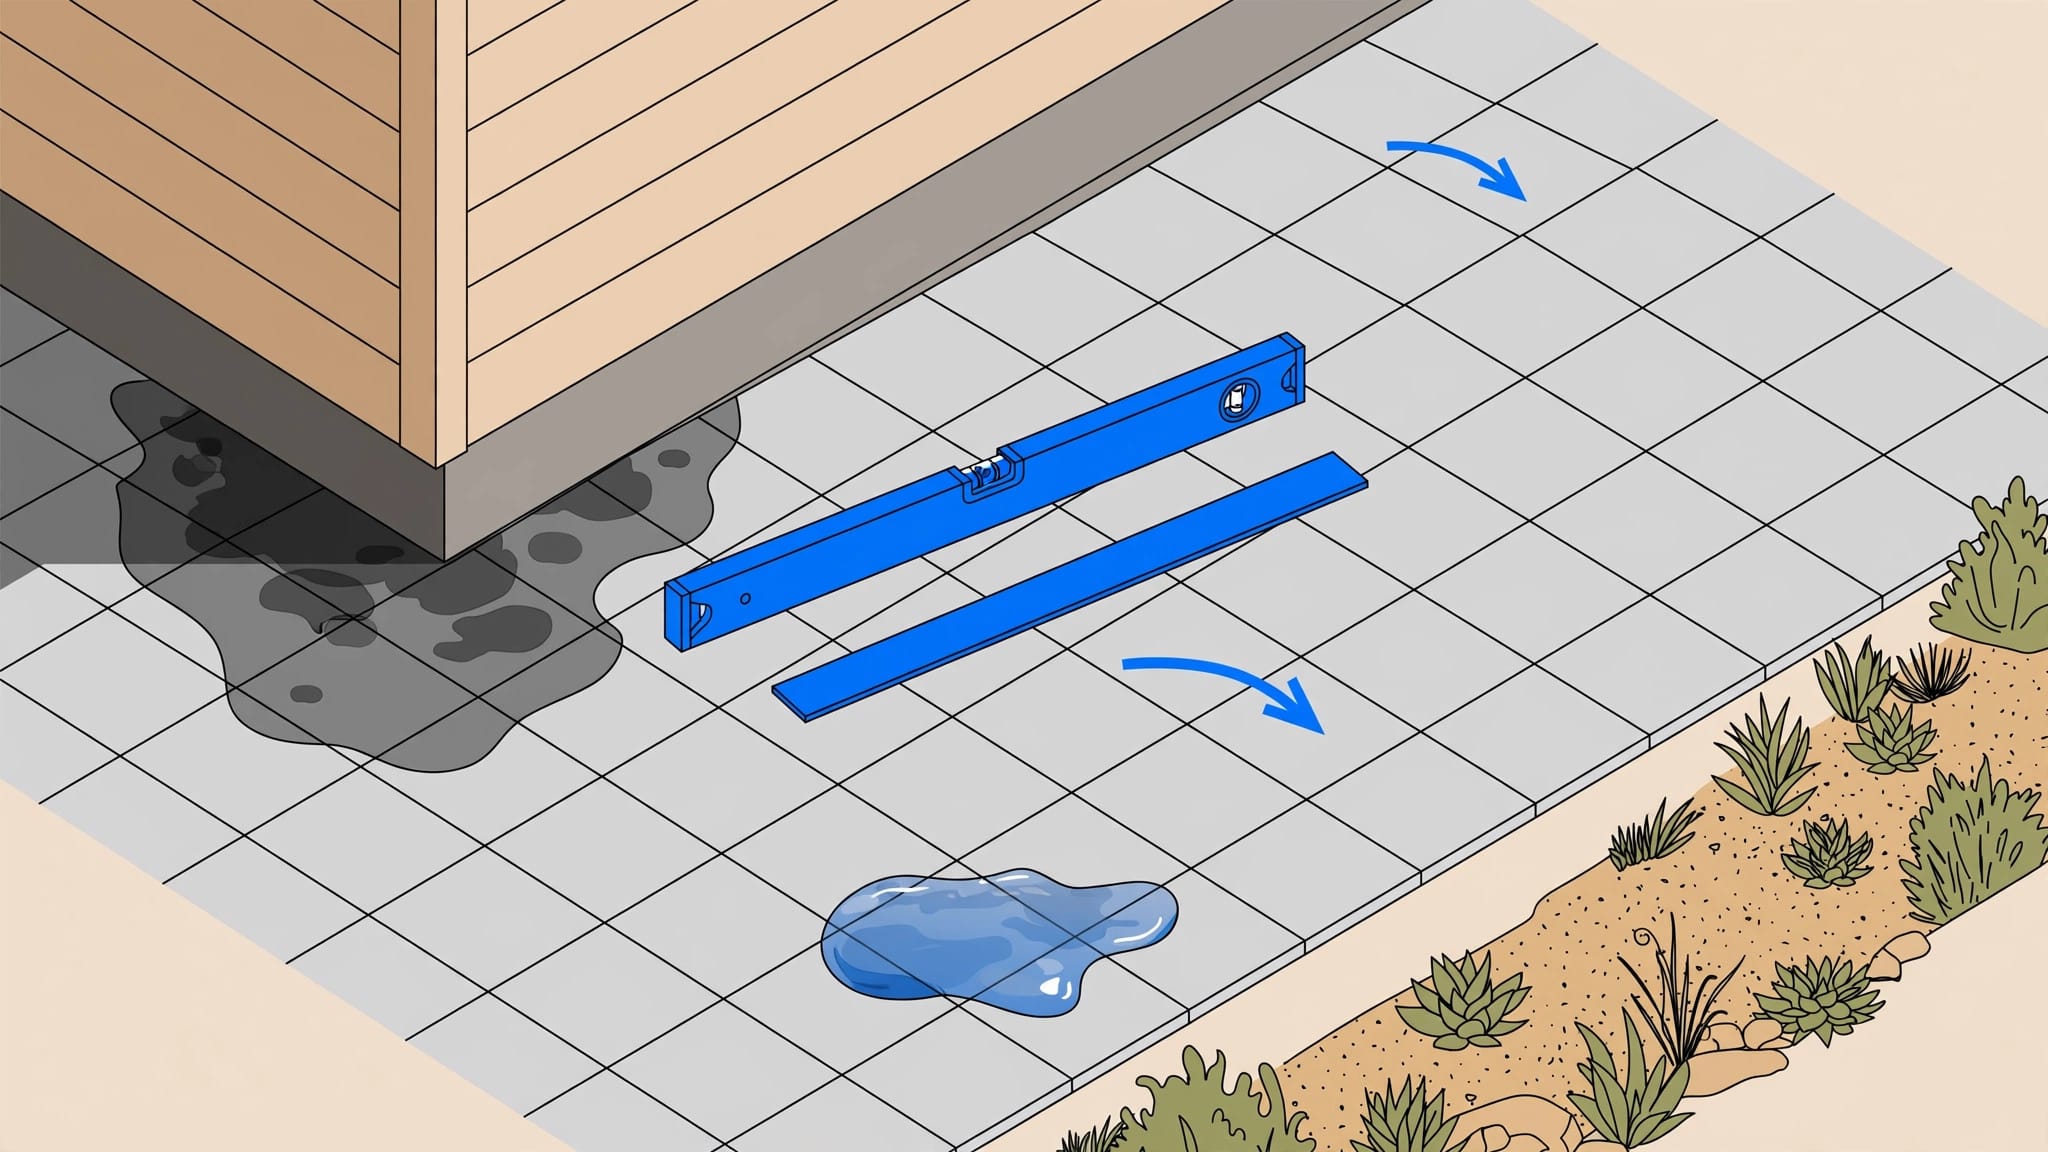
A paver patio can look clean and level while water slowly damages the base underneath. The right patio grade creates a reliable water drainage path, directing rain away from the foundation, door threshold, or lanai.
I see the warning signs after strong Southwest Florida storms: one dark corner, missing joint sand, a low area that stays wet, or pavers that no longer feel solid. Test the slope early, then correct the water path before a small repair turns into a larger rebuild.
Watch for the Early Signs of Bad Drainage
Water usually leaves clues before pavers start sinking. Walk the patio after rain, once the surface is safe, and pay attention to where moisture remains.
Puddles, dark patches, and recurring algae
A healthy patio should shed water and dry at a fairly even pace. One corner that stays dark for hours, especially near the house, needs a closer look.
Persistent algae or moss can also point to trapped moisture. Shade plays a part, but a strip of green buildup that returns soon after cleaning often means water is sitting there too long.
A patio that holds water in the same place after every storm is not a cleaning problem first. It is a drainage problem.
Loose joints and moving pavers
Rain moving across a patio can carry away joint sand. Missing polymeric sand, open joints, and sand collecting at the border can indicate surface runoff washing through the joints. These signs point to a drainage issue, not a substitute for correcting it.
Step gently across the area. A paver that rocks, drops underfoot, or catches a shoe needs attention. On pool decks, walkways, and entry paths, uneven pavers can become a real trip hazard.
How to Test a Paver Patio Slope
You don’t need to remove pavers to get a useful first reading. Start with simple measurements, then repeat the test in more than one direction.
Use the right measuring tools
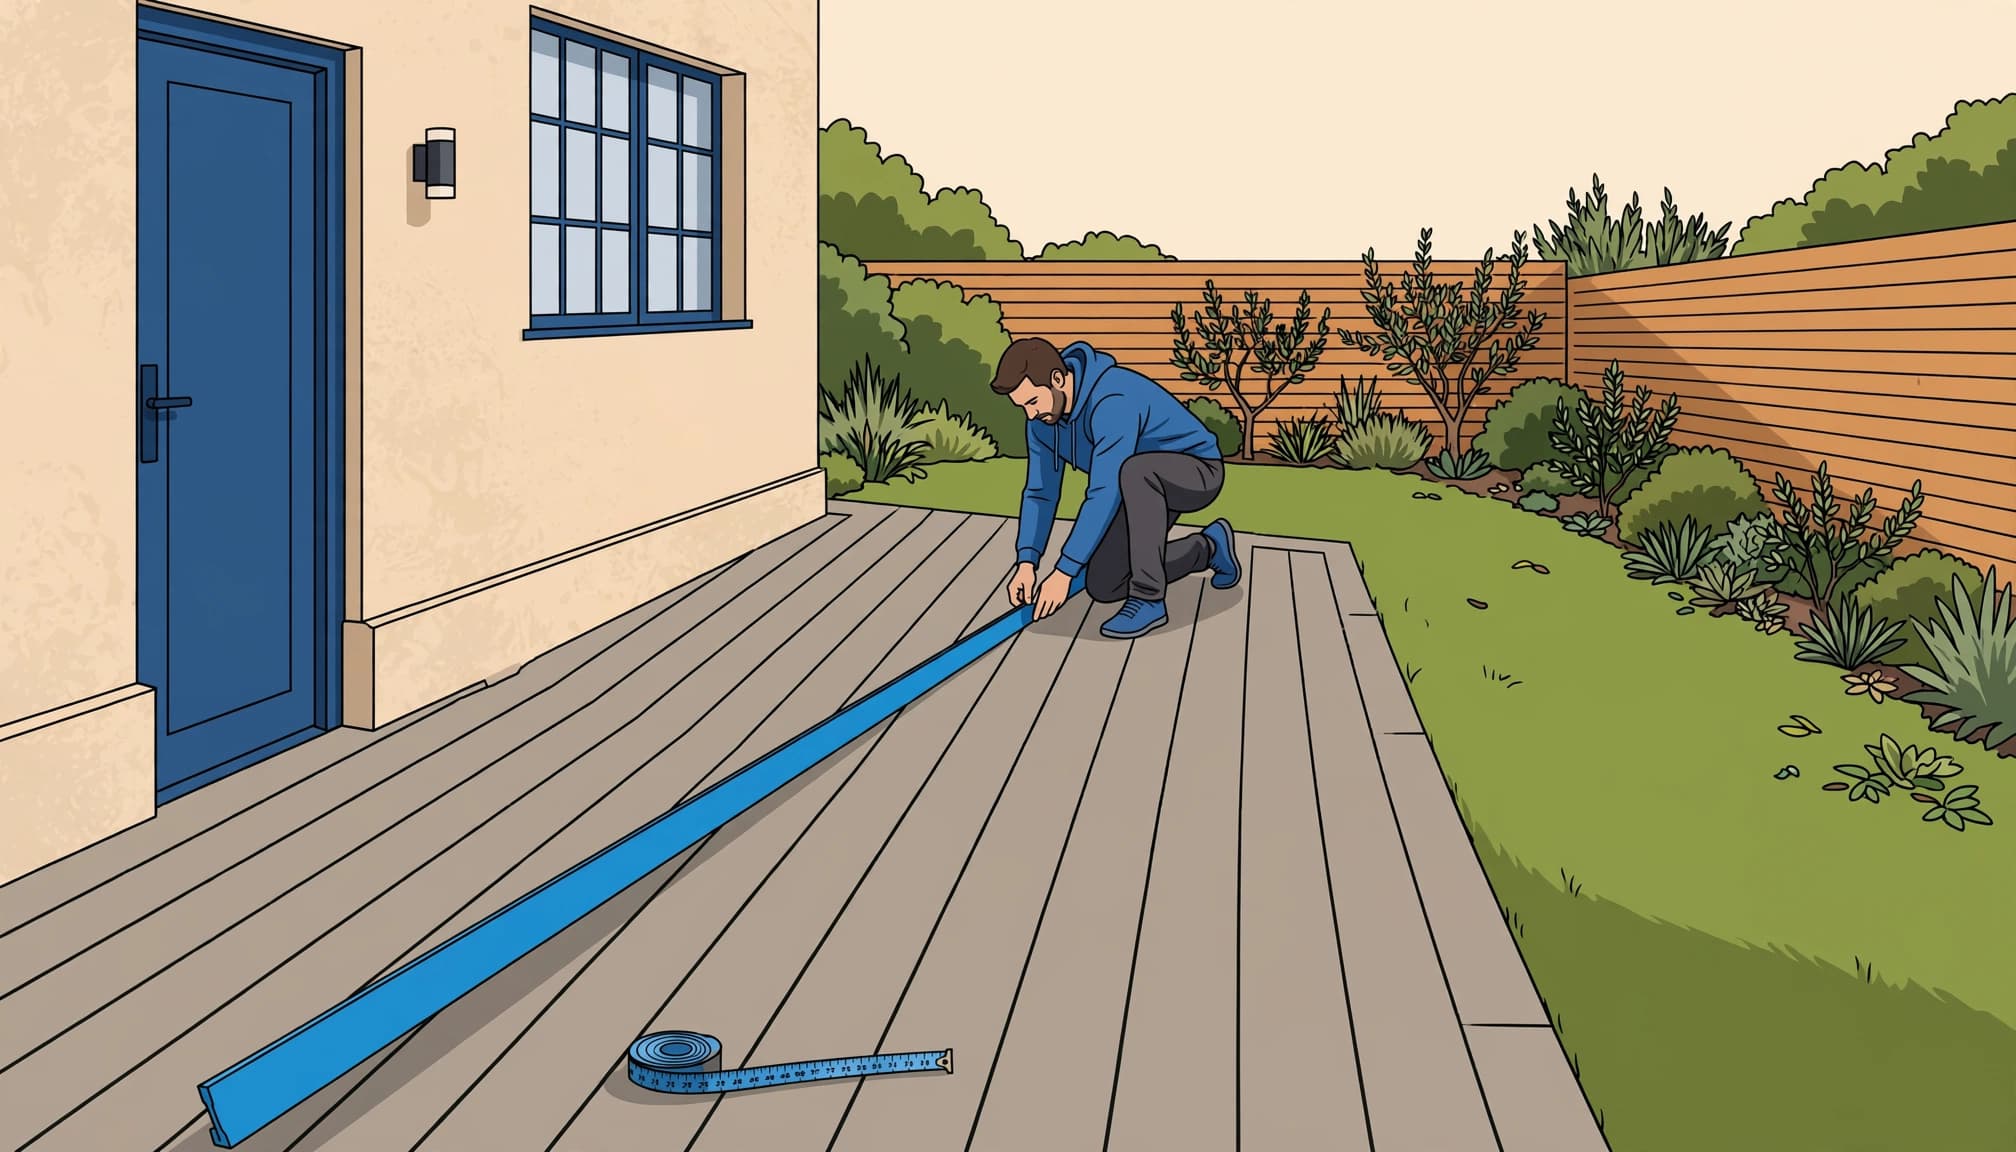
For most patios, you need a long straightedge or straight board, a carpenter’s level, a tape measure, and a small ruler. A laser level helps with large patios, long walkways, or surfaces with several suspected low spots.
If repairs require lifting or replacing pavers, you may also need base gravel and a vibratory plate compactor to rebuild and compact the supporting layer. For cut pavers, use a wet masonry saw or an angle grinder with a masonry blade. Wear eye protection, hearing protection, and gloves. Cutting is the easy part. Matching the repaired grade is what matters.
Measure the drop away from the house
Start at the highest point near the home. Run your straightedge outward toward the patio edge, then place the level on top. Raise the lower end of the straightedge until the bubble is centered.
Measure the open gap between the straightedge and the paver at the low end. Record the gap and the run length.
For the slope calculation, divide the elevation drop by the horizontal distance, then convert the result to a percentage. This gives the slope percentage. A common drainage target is 1% to 2% away from the house, or about 1/8 to 1/4 inch of drop per foot. Over an 8-foot run, a 2% grade drops close to 2 inches.
Check more than one line
Don’t test only the center of the patio. Run measurements near walls, doors, screen tracks, downspouts, landscape edges, and any area where you see staining or algae.
I also check across the patio, not only away from the home. A patio may slope outward overall but still contain a shallow bowl that traps water. Mark low spots with painter’s tape, take photos, and write down the date and measurement.
Choose a Slope That Fits the Property
A 1% slope may work on a protected patio with controlled runoff. In Florida, I prefer an outward drainage grade closer to 2% when the surface receives heavy rain, roof runoff, or driveway water.
That extra fall gives water a better path off the pavers. It also leaves room for minor settlement. During paver patio installation, establish the planned patio grade before adding the base and bedding materials.
Keep accessibility needs separate from drainage targets
A patio beside an accessible route may need more careful planning. The ADA accessible-route slope guidance limits running slope and cross slope for accessible walking surfaces.
Those rules don’t make every residential patio a 1:20 accessible route. They do matter when a patio connects to an entrance, ramp, or public-facing area. The Access Board’s ramp guidance also applies to ramps, not ordinary patio drainage.
Check local building codes and approved plans before changing the grade near an entrance or property line.
Factor in soil and storm conditions
Florida doesn’t deal with frost heaving the way northern states do, but heavy rain can soften soil, cause soil erosion, move sand, and wash support from beneath the pavers. Northern homeowners need to watch freeze-thaw movement too, since repeated expansion and contraction can shift a base.
Permeable pavers still require a properly prepared, consistently graded base. Where site conditions warrant it, geotextile fabric may help separate weak soil from the aggregate.
Foundation settling or fresh backfill near a foundation can gradually change the grade. Nearby grade changes or retaining walls can also redirect water toward the patio. That is why I recommend checking the same measurements after major storms and at least once a year.
Follow the Water Before Blaming the Patio
The patio is often where you see the problem, but it may not be where it starts. I trace the complete water drainage path, then inspect the surrounding hardscape.
Check roof runoff and downspouts
A clogged gutter or short downspout extension can dump a large volume of water onto one patio edge. Roof cleaning can reduce debris entering the gutter line, but clean gutters still need to direct water away from the pavers.
A soft wash is often the safer choice for roof surfaces, depending on the material. Still, cleaning the roof doesn’t correct a bad runoff path. Extend downspouts, clear drain lines, or connect drainage where water repeatedly hits the same spot.
Look at the driveway and landscape beds
Water can race down a sloped driveway and turn toward the patio. Driveway sealing protects the surface and helps with maintenance, but it can’t change the existing grade.
Also inspect mulch beds, planters, retaining walls, and other landscape structures. Soil built too high against the paver edge can redirect water across the surface. A washed-out border may show soil erosion or lost supporting material. Stable edge restraints can help contain the paver field, but they can’t correct an incorrectly graded base. The area may need better grading or, when flow is concentrated, trench drains to move water away.
Repair the Cause Below the Pavers
Do not add loose sand to a low paver and expect it to stay fixed. If the support below is wet, soft, or missing, the dip will usually return.
Rebuild weak base material
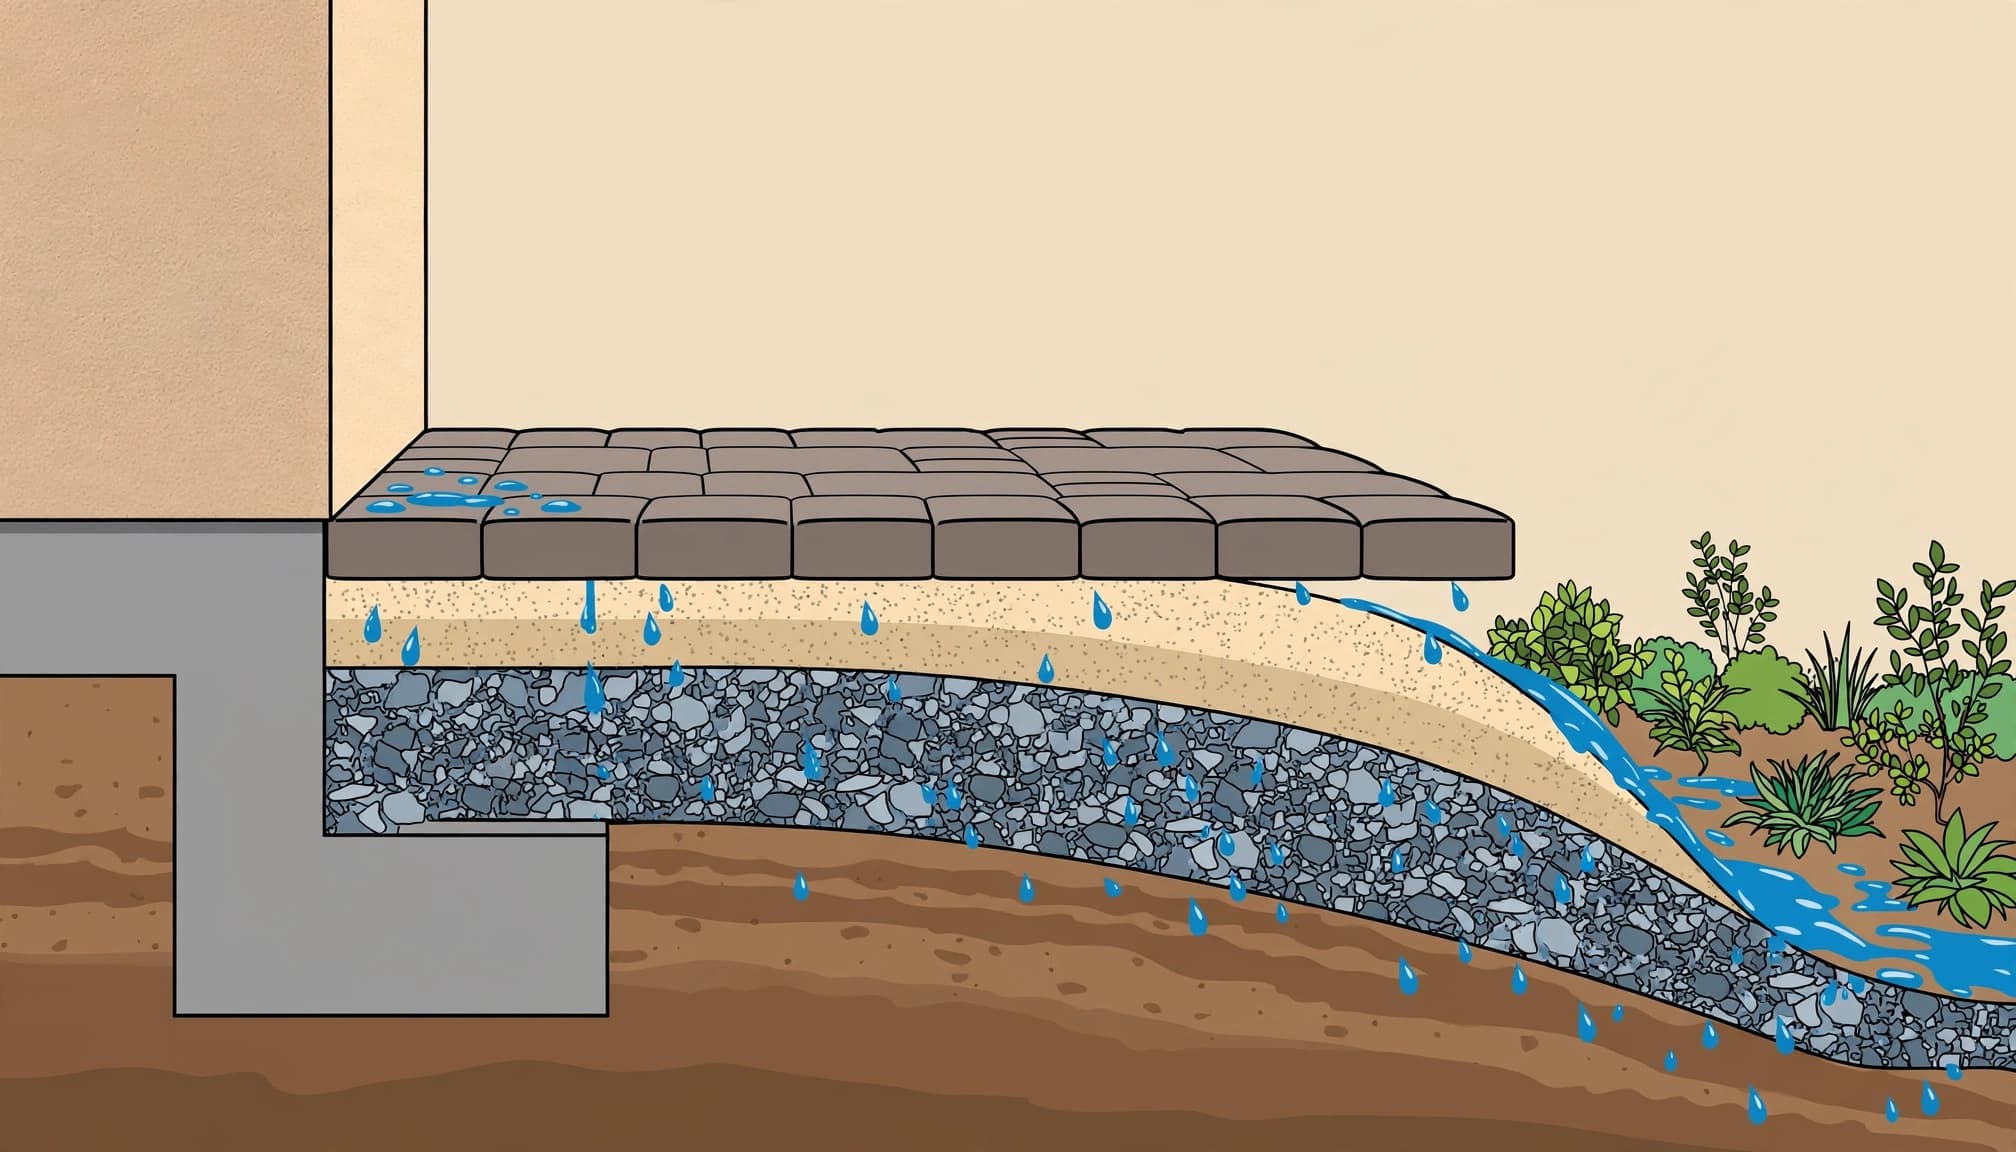
For a small repair, lift affected pavers so the bedding course and base can be inspected. Remove soft or washed-out material, repair support lost through soil erosion, then add base gravel in compacted layers.
Verify subsoil compaction before rebuilding, and consider geotextile fabric where weak soil threatens aggregate separation. A vibratory plate compactor helps create stable support. Permeable pavers may require different base specifications. On a new paver patio installation, proper patio construction establishes the grade before the bedding course and pavers are placed. A thin bedding course sets paver height, not structural fill for a deep void.
Reset edges and restore the joints
Edge restraints keep the field of pavers from spreading outward. If the border is moving, repair it before resetting interior pavers.
Once the repaired area is firm and properly graded, reinstall the pavers and verify the repaired drainage grade again. Then refill the joints with compatible polymeric sand, following the product directions.
Polymeric sand helps lock joints together and reduce sand loss. It cannot repair a failed base, stop standing water, or flatten an uneven patio. For areas with broad settlement or recurring washout, brick patio restoration may include re-leveling, base repair, joint work, and surface protection.
Keep a Simple Slope Monitoring Routine
I recommend taking photos before and after a heavy storm. Capture the patio edge, downspouts, drains, low areas, and any missing polymeric sand. After storms, missing polymeric sand can signal a maintenance need, but it shouldn’t mask movement or a failed base. Repeat your straightedge readings at the same marked points.
Pay close attention to water beside walls, screen enclosures, doors, and pool-deck exits. Watch for repeated soil erosion near the patio edge, downspouts, or drains. If a low spot gets deeper, several pavers begin rocking, or an edge continues to spread, the problem is below the surface.
Pressure washing can remove grime, algae, and packed debris so you can see the pavers clearly. It should be controlled. Excessive pressure can strip joint sand or damage the paver face. After repairs, allow the surface to dry fully before sealing. These paver drying-time guidelines recommend at least 24 to 48 hours after pressure washing as a starting point, depending on weather and moisture.
Key Takeaways
- A patio near the home should fall away from the foundation, with a 1% to 2% drainage slope being a common residential target.
- Use a straightedge, level, and tape measure to test the elevation drop in several directions.
- Standing water, recurring algae, missing joint sand, and rocking pavers are early warnings.
- Check gutters, downspouts, driveway runoff, drains, and landscape borders before blaming the patio alone.
- Sealer and polymeric sand protect a stable patio. They don’t correct a failed base or poor grade.
Frequently Asked Questions
Can I fix a minor patio drainage issue myself?
You can often clear a drain, extend a downspout, remove built-up mulch, or replace small amounts of missing joint sand. A patio that is sinking, rocking, or holding water against the house needs a more complete inspection.
Why do pavers keep moving after rain?
Water can enter open joints, wash fine material from the base, and soften the soil below. Once support is lost, the pavers may settle, rock, or spread at the edges. The repair needs to address the water source and rebuild stable support.
Will sealing fix water pooling on pavers?
No. Paver sealing can reduce staining, moisture absorption, and joint-sand loss after repairs. It will not change the patio grade or fill a low spot. Fix the drainage and base first, then protect the stable surface.
Protect the Patio Before the Damage Spreads
A proper patio grade is simple to test, but the results can reveal bigger issues with runoff, soil support, or base material. Water that repeatedly follows the wrong path doesn’t stop on its own.
If your patio is pooling, shifting, or washing out after storms, Get a Quote for sealing or pressure cleaning services, paver repair, and a clear assessment from a professional contractor. They can identify pooling, shifting pavers, washout, or a potentially unstable base. The best time to correct a wet area is before it becomes a full patio rebuild.
